openstack版本:liberty
vsphere版本:6.0
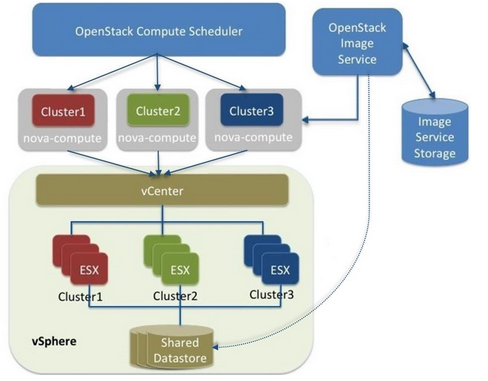
拓扑图

架构图

vmware对接openstack有两种驱动
1,VCDriver,以nova driver的方式通过vcenter来控制计算和网络
2,VMDKDriver,以cinder driver的方式通过vcenter来控制datastore。
需要注意的是本文档的对接都是对接vmware的标准交换机进行对接的,如果需要对接vmware的dvs的话需要安装另外的包并配置neutron。
这里采用vcdriver的方式
这种方式目前有几个问题
1,就是已经存在vmware集群的vm是不能被openstack管理了,只有新创建的机器可以被openstack管理。
2,vlan模式下,VCDriver要求vCenter里被使用的VLAN port group的名字必须和OpenStack里integration bridge(默认是br-int)的名字一样,而且vlan 号也得一样,这里我配置port group为0,表示不做限制。
3,首次创建虚机会花费很长时间,因为需要将镜像从glance通过vcenter 拷贝到cluster后端的datasotre,后面再创建速度就会很快。
要点:
一台计算节点对接vsphere,需要这台计算节点能根vcenter通信。
Vsphere上的配置
配置好对应的openstack计算节点对应的cluster
如这个vsphere的cluster_name为UAT_Lenovo_6.0


cluster对应的storage名字
创建对应的port_group

nova配置
需要注意对应的物理适配器,待会需要写到配置项内。
1 | openstack平台对接vcenter配置参考 |
修改/etc/nova/nova.conf配置文件:
1 | [default] |
需要注意这些参数仔细核对。
启动openstack-nova-compute服务:systemctl restart openstack-nova-compute
此时应该可以看见vmware 对应的hypervisor
转换镜像将一个qcow2的镜像转换成vmware用的vmdk格式
glance配置
转换镜像格式为vmdk:qemu-img convert -f raw -O vmdk centos_6.5.raw centos_6.5.vmdk
上传镜像:
1 | glance image-create --name=centos-6.5.vmdk --disk-format=vmdk --property hypervisor_type="vmware" --property vmware_adaptertype="ide" --property vmware_disktype="sparse" --is-public=True --property vmware_ostype="otherLinuxGuest" --container-format=bare < centos_6.5.vmdk |
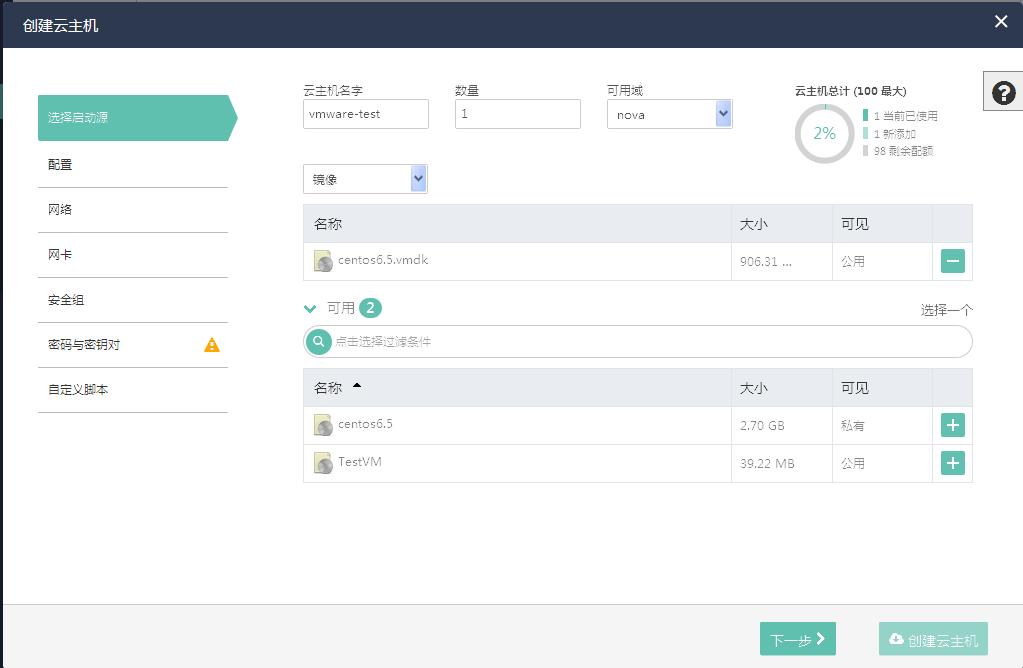
创建虚拟机进行测试


第一次创建时间比较久因为要将镜像从glance 拷贝到vmware 的storage内
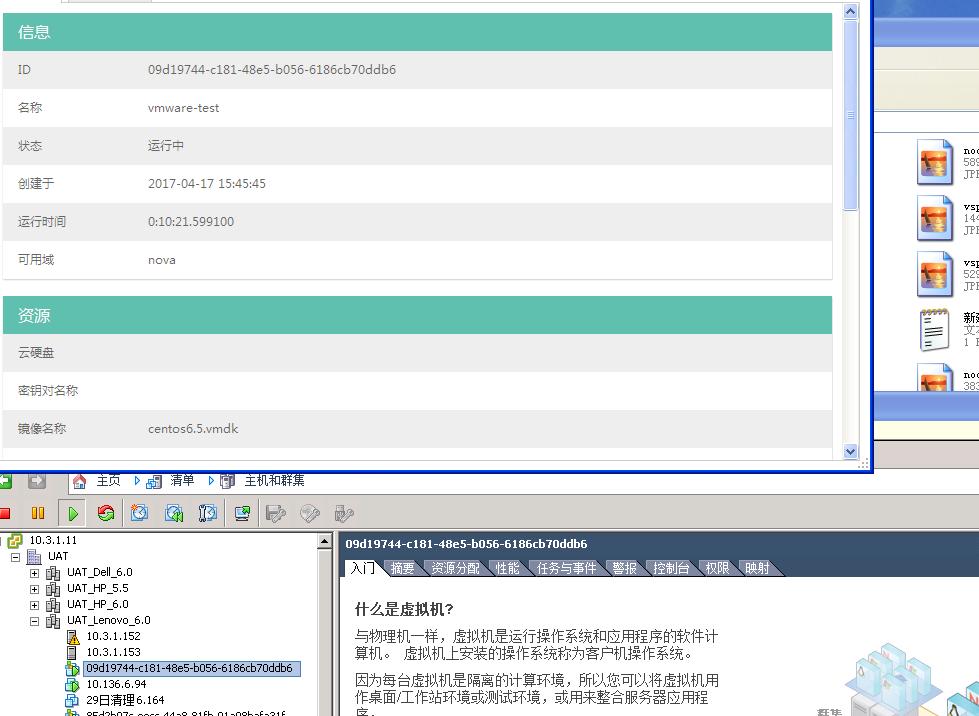
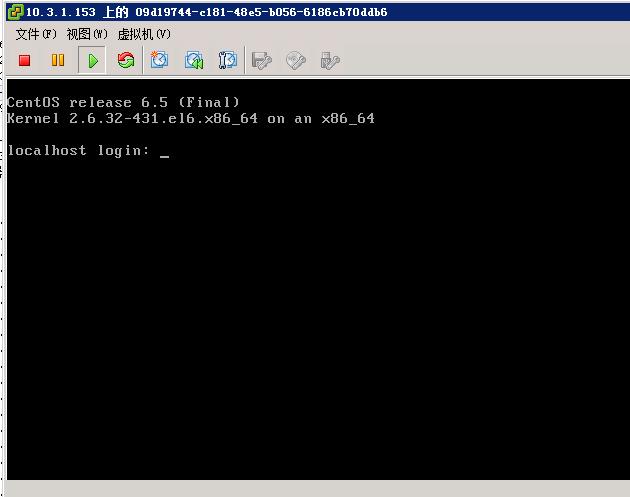
可以看见vsphere内已经有以uuid命名的vm了,表示创建成功

后面为可选配置,配置cinder对接vmware存储
cinder配置
编辑/etc/cinder/cinder.conf配置文件,修改如下参数:
1 | volume_driver=cinder.volume.drivers.vmware.vmdk.VMwareVcVmdkDriver |
重启cinder-volume服务:/etc/init.d/openstack-cinder-volume restart
创建多类型存储:cinder type-create vmwarecinder type-key vmware set volume_backend_name=vmwarecinder type-create cephcinder type-key ceph set volume_backend_name=DEFAULT
创建云硬盘,挂在云主机进行测试
mitaka版本对接vsphere6.5
mitaka对接vsphere有个bug就是在https的连接情况下会连接失败
https://review.openstack.org/#/c/341816/
替换/usr/lib/python2.7/site-packages/nova/virt/vmwareapi/vmops.py
重启nova-computesystemctl restart openstack-nova-compute
编辑nova.conf
1 | [vmware] |
重启nova-computesystemctl restart openstack-nova
输入nova hypervisor-list可以看见vmware这个hypervisor
cinder对接vmware datastore
1 | cp /usr/lib/python2.7/site-packages/oslo_vmware/wsdl/6.0 /usr/lib/python2.7/site-packages/oslo_vmware/wsdl/6.5 |
2、修改 enabled_backends = ceph为 enabled_backends = ceph,vmware
3、创建type-key,其中ceph的也需要创建(web界面也可以做,在全局管理里——云硬盘类型)
1 | cinder type-create vmware |
cinder type-key vmware set vmware:storage_profile=cinder-storage-policy
1 | 即可。=号后是之前创建的策略名字!! |
https://docs.openstack.org/mitaka/config-reference/compute/hypervisor-vmware.html
http://blog.csdn.net/jmilk/article/details/52102020
http://blog.csdn.net/halcyonbaby/article/details/37818789
http://www.cnblogs.com/zhoumingang/p/5514556.html
http://www.iyunv.com/forum.php?mod=viewthread&tid=86702
