概述 stable diffusion做为目前AI绘图内开源的最强王者,本文主要在本地PC上部署使用是由Stability AI、CompVis與Runway合作开发,采用Apache2.0开源协议。https://github.com/Stability-AI/stablediffusion
本文用的是基于于stable diffusion封装的stable-diffusion-webui项目,简单直观能快速上手。
安装环境
软硬件
版本\型号
显卡
RTX 3060 12GB
OS
Windows 11
Python
3.10.6
conda
23.5.2
显卡驱动
537.42—>对应cuda 12.2
CUDA版本
12.2
git
2.42.0
stable-diffusion-webui
1.6
安装部署 基础环境部署 git安装 https://git-scm.com/download/win
下载git安装,最新版,下一步就好。
python安装 通过conda管理和安装python,需要注意的是python版本,不要用超过3.10.x版本的python,我这里是下载的https://repo.anaconda.com/miniconda/
参考:https://github.com/AUTOMATIC1111/stable-diffusion-webui/wiki/Dependencies
下一步安装就好,安装完成后在CMD中可以正常执行python命令
1
2
python --version Python 3.10.12
配置conda源
开始菜单用管理员身份执行打开miniconda3
1
2
conda config --set show_channel_urls yes
生成配置文件
编辑配置文件添加清华大学加速地址
1 C:\Users\wansh\.condarc //wansh替换为你的用户名
粘贴以下内容
1
2
3
4
5
6
7
8
9
10
11
12
13
14
15
channels: - defaults show_channel_urls: true default_channels: - https://mirrors.tuna.tsinghua.edu.cn/anaconda/pkgs/main - https://mirrors.tuna.tsinghua.edu.cn/anaconda/pkgs/r - https://mirrors.tuna.tsinghua.edu.cn/anaconda/pkgs/msys2 custom_channels: conda-forge: https://mirrors.tuna.tsinghua.edu.cn/anaconda/cloud msys2: https://mirrors.tuna.tsinghua.edu.cn/anaconda/cloud bioconda: https://mirrors.tuna.tsinghua.edu.cn/anaconda/cloud menpo: https://mirrors.tuna.tsinghua.edu.cn/anaconda/cloud pytorch: https://mirrors.tuna.tsinghua.edu.cn/anaconda/cloud pytorch-lts: https://mirrors.tuna.tsinghua.edu.cn/anaconda/cloud simpleitk: https://mirrors.tuna.tsinghua.edu.cn/anaconda/cloud
conda3-cmd中执行以下命令配置python pip下载包的软件源,这里指向阿里云
1 pip config set global.index-url https://mirrors.aliyun.com/pypi/simple
配置后查看
1
2
pip config list global.index-url='https://mirrors.aliyun.com/pypi/simple'
CUDA配置 查看显卡安装的驱动对应的CUDA版本
1
2
3
4
5
6
7
8
9
10
11
12
13
14
15
16
17
18
nvidia-smi.exe Fri Oct 6 15:14:48 2023 +---------------------------------------------------------------------------------------+ | NVIDIA-SMI 537.42 Driver Version: 537.42 CUDA Version: 12.2 | |-----------------------------------------+----------------------+----------------------+ | GPU Name TCC/WDDM | Bus-Id Disp.A | Volatile Uncorr. ECC | | Fan Temp Perf Pwr:Usage/Cap | Memory-Usage | GPU-Util Compute M. | | | | MIG M. | |=========================================+======================+======================| | 0 NVIDIA GeForce RTX 3060 WDDM | 00000000:2B:00.0 On | N/A | | 0% 53C P8 16W / 170W | 5441MiB / 12288MiB | 0% Default | | | | N/A | +-----------------------------------------+----------------------+----------------------+ +---------------------------------------------------------------------------------------+ | Processes: | | GPU GI CI PID Type Process name GPU Memory | | ID ID Usage |
对应的是12.2,去Nvidia官网下载对应的CUDA版本安装https://developer.nvidia.com/cuda-toolkit-archive
终端命令配置 配置代理需要拉取stable-diffusion-webui,需要conda3-cmd能够访问github
1
2
set https_proxy=http://127.0.0.1:33210 set http_proxy=http://127.0.0.1:33210
验证
状态码返回200表示ok
1
2
3
4
5
6
7
8
9
10
11
12
13
14
15
16
17
HTTP/1.1 200 OK Transfer-Encoding: chunked Cache-Control: private Connection: keep-alive Content-Security-Policy-Report-Only: object-src 'none';base-uri 'self';script-src 'nonce-EsiPFL30vCI9foliBMkTLA' 'strict-dynamic' 'report-sample' 'unsafe-eval' 'unsafe-inline' https: http:;report-uri https://csp.withgoogle.com/csp/gws/other-hp Content-Type: text/html; charset=ISO-8859-1 Date: Fri, 06 Oct 2023 07:32:54 GMT Expires: Fri, 06 Oct 2023 07:32:54 GMT Keep-Alive: timeout=4 P3p: CP="This is not a P3P policy! See g.co/p3phelp for more info." Proxy-Connection: keep-alive Server: gws Set-Cookie: 1P_JAR=2023-10-06-07; expires=Sun, 05-Nov-2023 07:32:54 GMT; path=/; domain=.google.com; Secure Set-Cookie: AEC=Ackid1QHNMFx6j8Bfaco7KM-Wc2Il-3JpKjmJcRYM3QqzErZfcup19XB43Y; expires=Wed, 03-Apr-2024 07:32:54 GMT; path=/; domain=.google.com; Secure; HttpOnly; SameSite=lax Set-Cookie: NID=511=ksuU76xakl0AZHIz-SjvI3pBnThANk3EBkMB7E4ZD1JNMxpQI8pg8rttvpYMdMqJSgfTwVt0Dqv-5V5p4uwnCRgb-KA_iOqHQ9lNPcsi0PjgXVbWAYhVIG2oCxmw_Jfw5XhA6QbDbpQcMq3zS9zkjx9gUwgHS-Howlm5ip9uU84; expires=Sat, 06-Apr-2024 07:32:54 GMT; path=/; domain=.google.com; HttpOnly X-Frame-Options: SAMEORIGIN X-Xss-Protection: 0
stable-diffusion-webui部署 拉取stable-diffusion-webui代码
clone代码
1 git clone https://github.com/AUTOMATIC1111/stable-diffusion-webui.git -b v1.6.0
下载stable diffusion的训练模型
sd-v1-4.ckpt
https://huggingface.co/CompVis/stable-diffusion-v-1-4-original/tree/main
模型是用于AI绘图的元素素材库
下载后放置到E:\stable-diffusion-webui\models\Stable-diffusion目录。E盘根据部署盘符替换
在conda3-cmd执行
1
2
cd stable-diffusion-webui webui-user.bat
系统会自动执行下载对应的依赖包
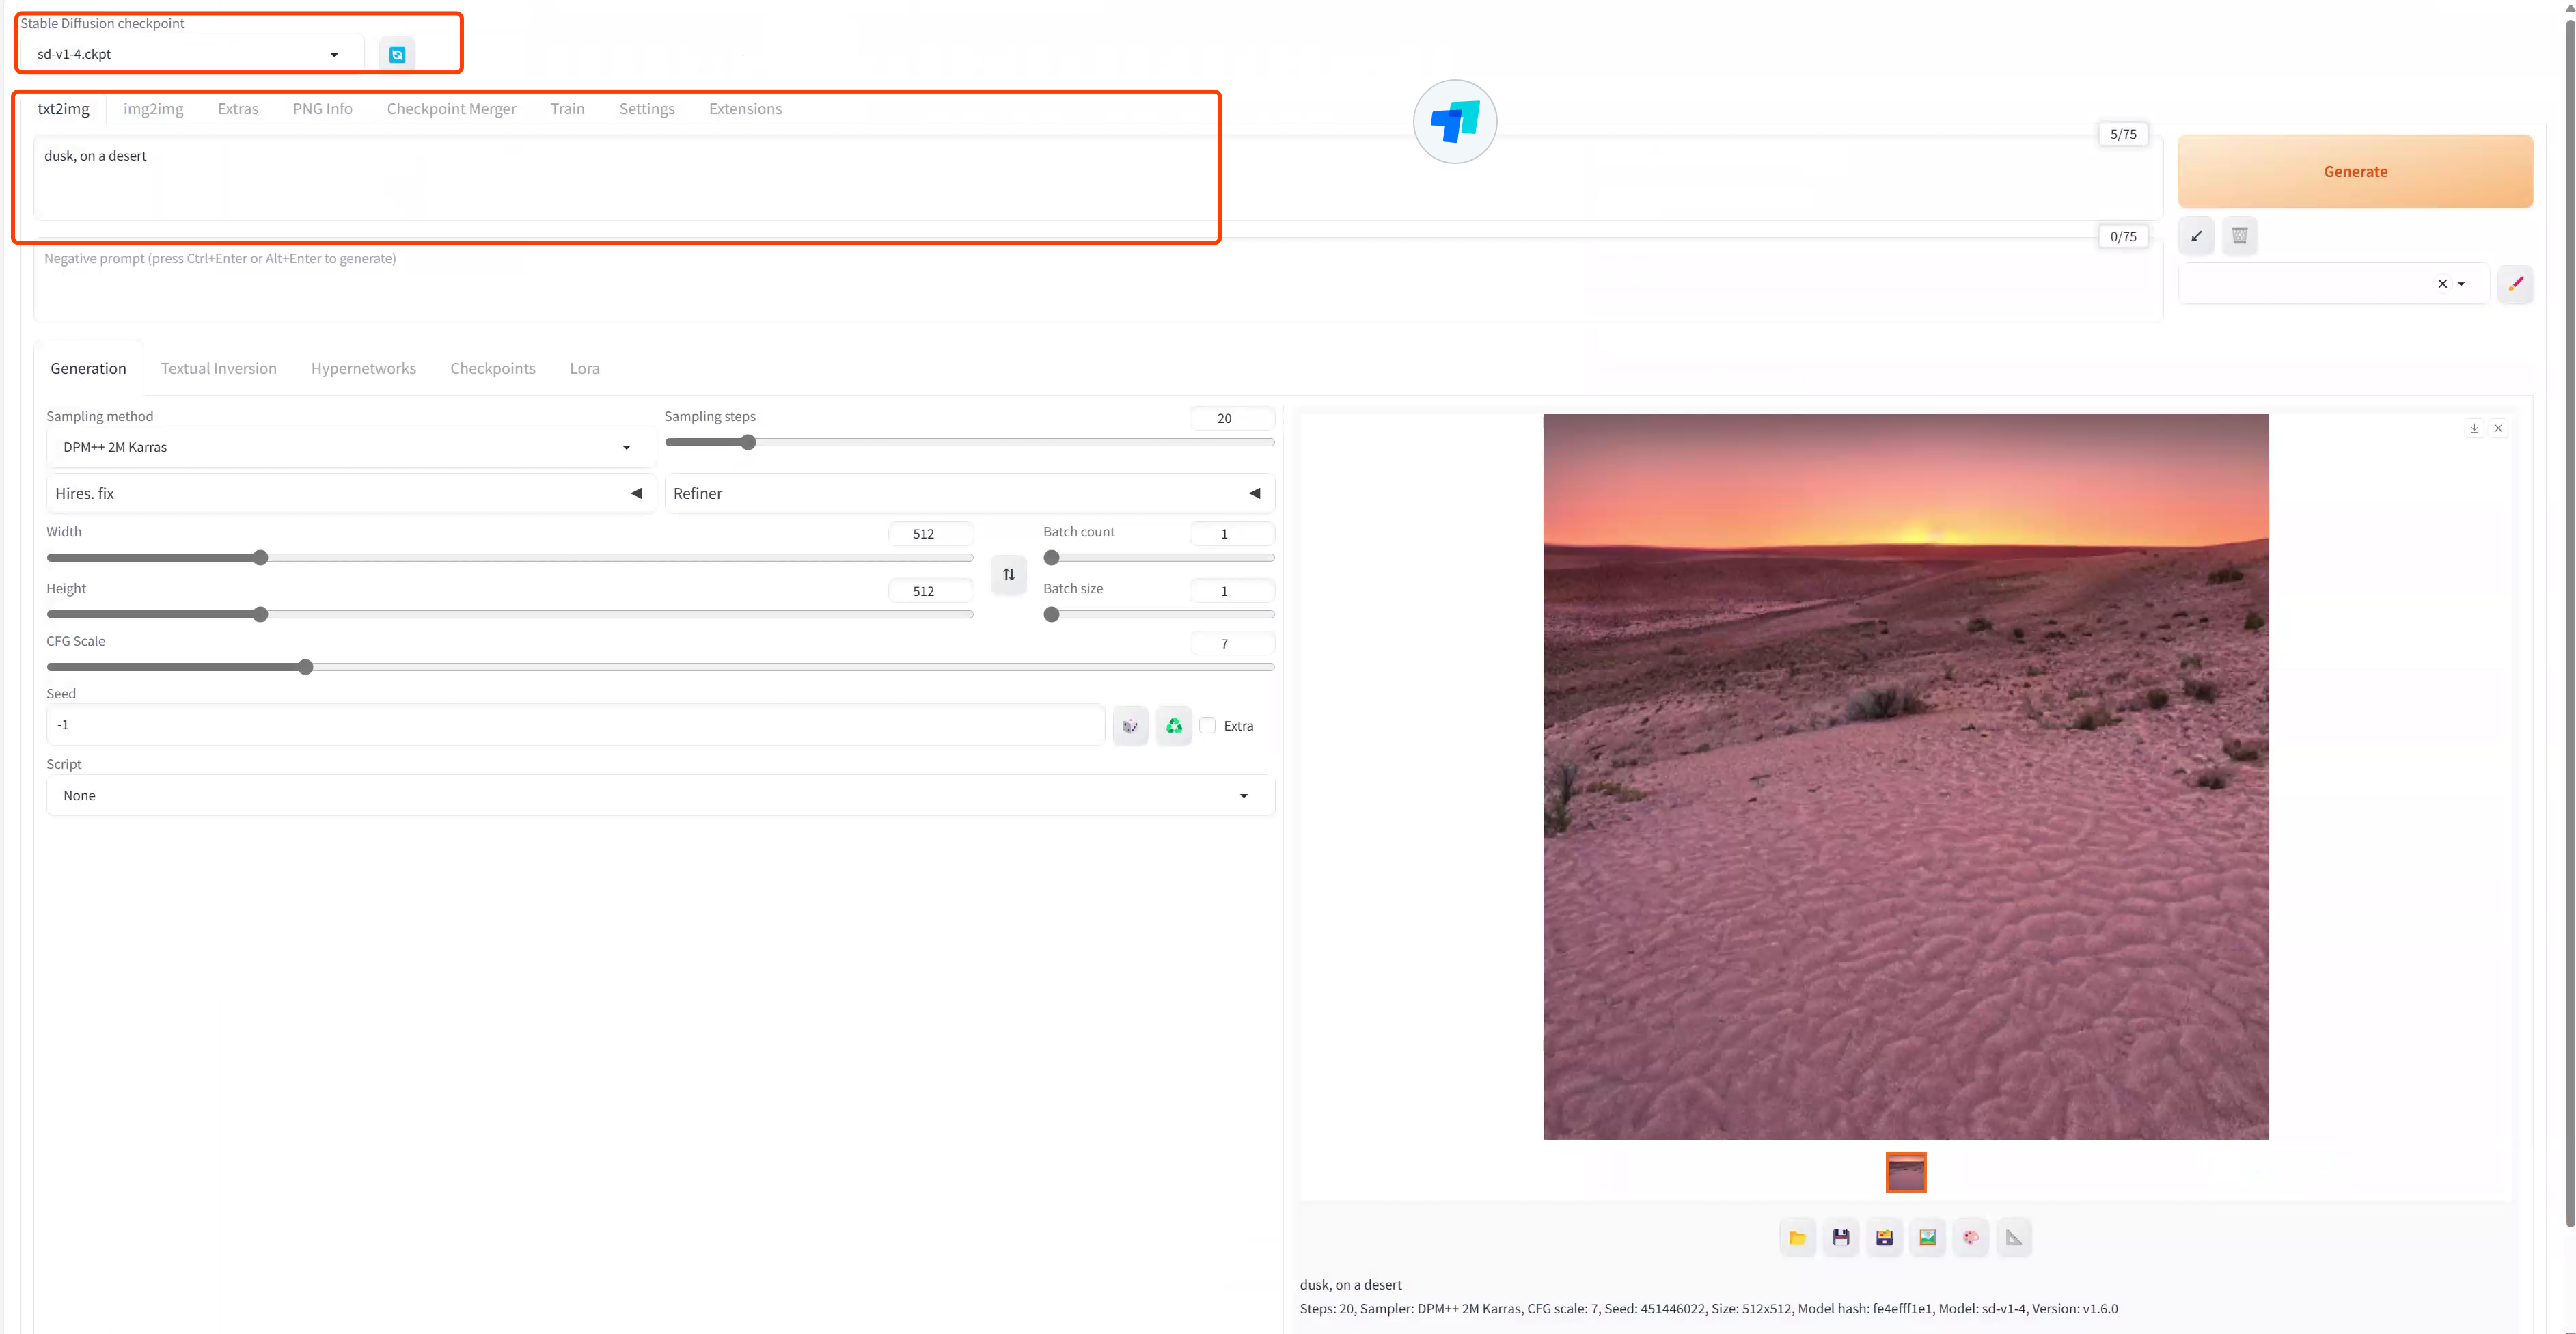
执行成功会自动打开浏览器访问http://127.0.0.1:7860/
输入prompt生成图片
当然也可以使用此prompt生成器进行https://tinygeeker.github.io/menu/autocue/#/?from=tencent
常见问题 1、RuntimeError:Torch is not able to use GPU
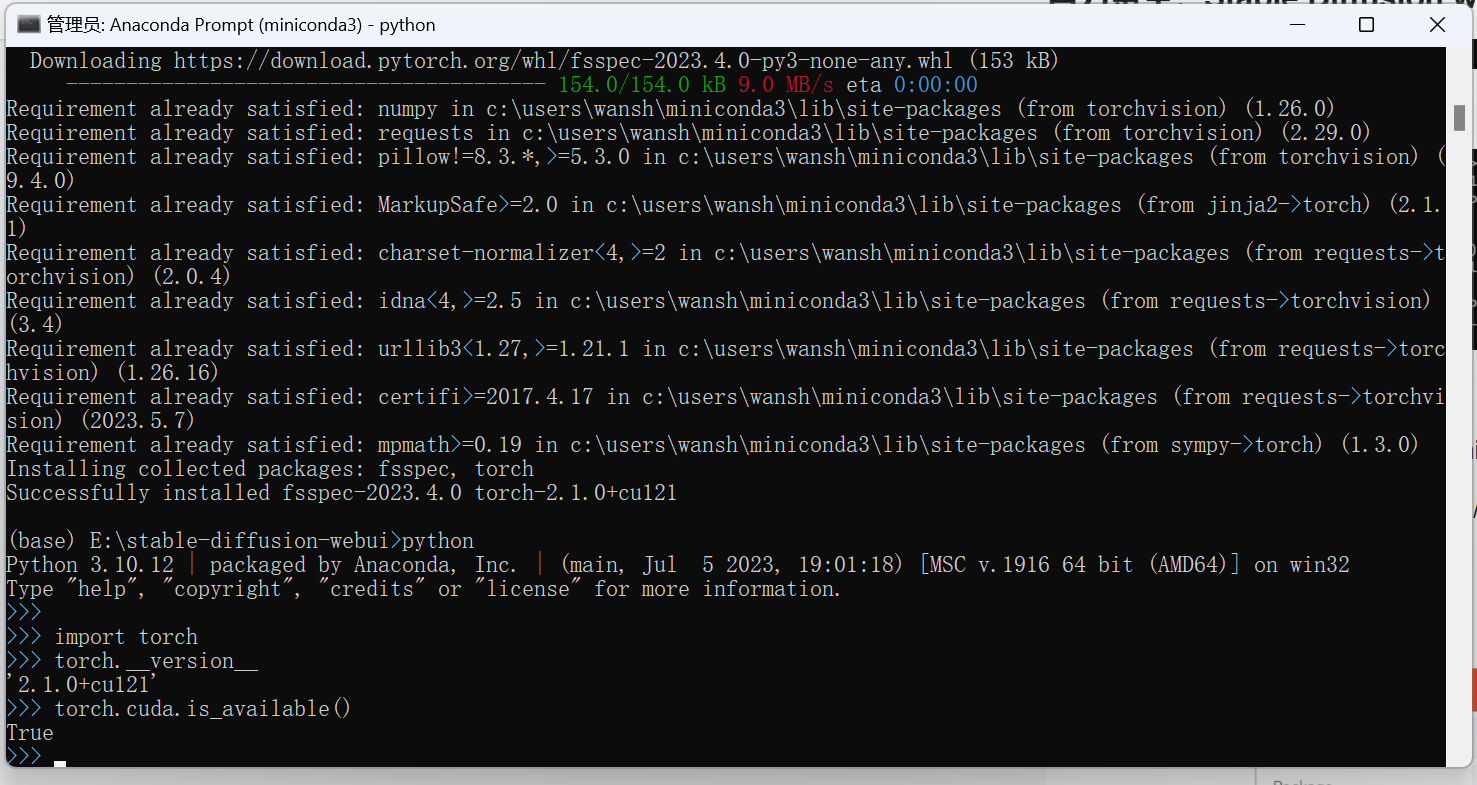
这个原因主要是因为pytorch没有连接到GPU,cuda与torch版本不兼容导致的
通过https://pytorch.org/get-started/locally/下载合适的torch版本,我这里是NVIDIA cuda12.2,但torch还没有对应的12.2版本,直接用11.8、12.1也能正常运行,目前1.6最高支持到11.8,可以向下兼容,正常pip配置了正常的源可以自动下载。
验证
参考链接:
https://zhuanlan.zhihu.com/p/610628741
https://www.uisdc.com/47-stable-diffusion-models
https://zhuanlan.zhihu.com/p/622410028 https://aitechtogether.com/python/82781.html


